Unlock Natural Sweetness: Your Definitive Guide on How to Make Date Paste at Home
Are you tired of store-bought date paste that's often gloopy, overly sweet, or just doesn't hit the mark? Or perhaps you're looking for a natural, whole-food sweetener to elevate your baking, smoothies, and savory dishes? Mastering
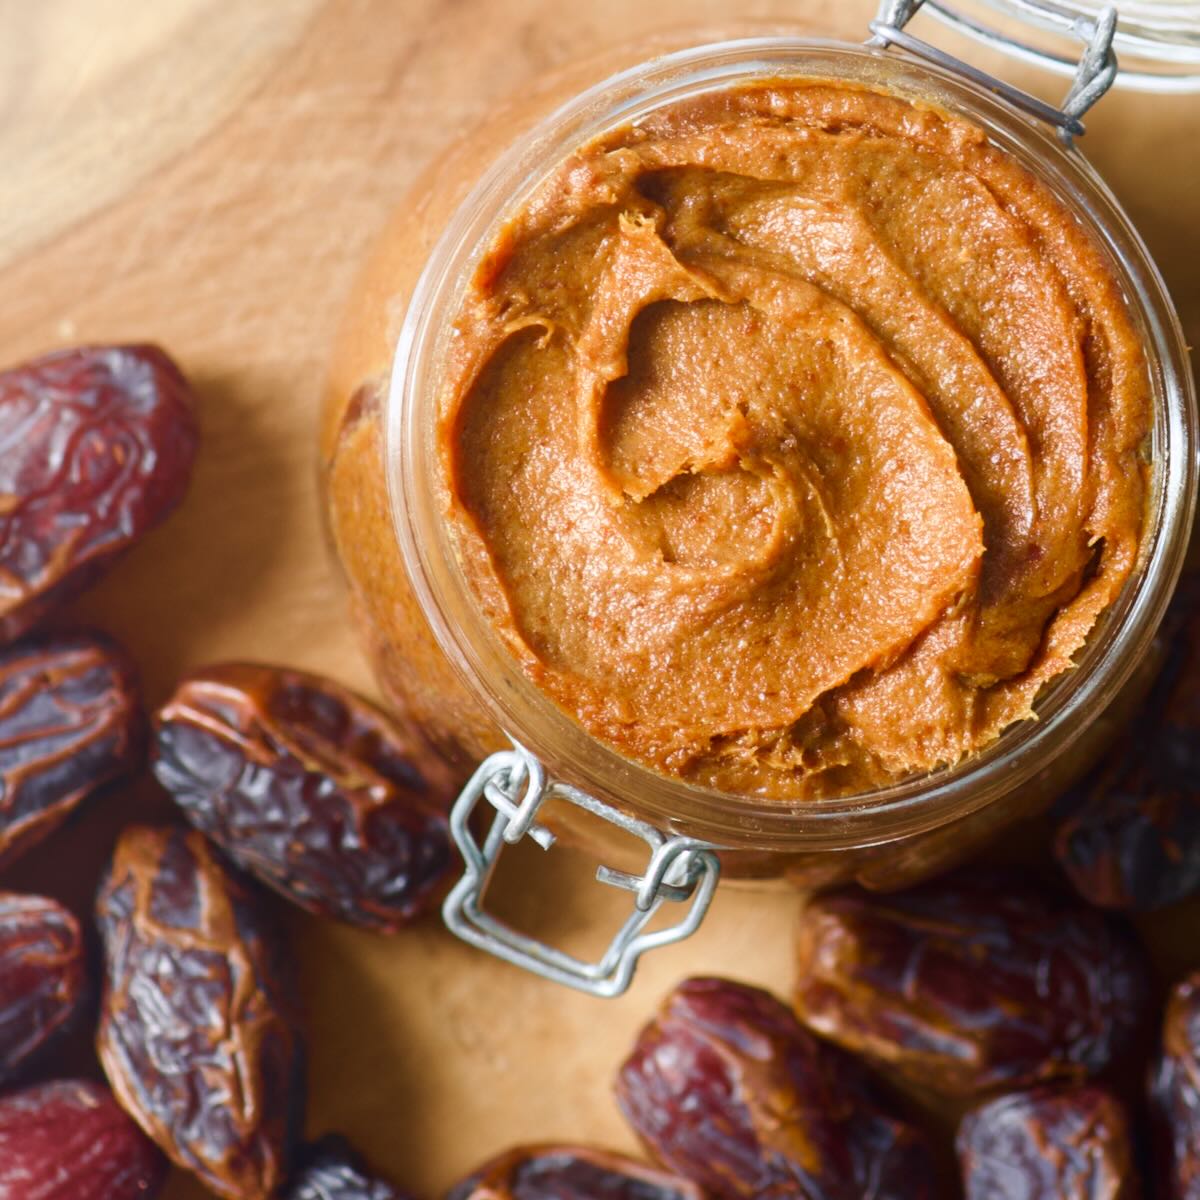
how to make date paste at home is a culinary game-changer, opening up a world of rich, caramel-like sweetness without refined sugars. This versatile ingredient is a staple in Moroccan and Mediterranean pastries, perfect for date bars, truffles, and as a healthy binder for energy bites. And the best part? It's surprisingly easy and quick to prepare, even if you don't have an exotic Middle Eastern market nearby.
For years, many home cooks have had a love-hate relationship with date paste – loving the idea of a wholesome, natural caramel, but frustrated by gritty homemade versions. The secret lies not just in the dates themselves, but in the technique. This comprehensive guide will walk you through three effective methods to achieve perfectly smooth, intensely flavorful date paste, promising a superior result every time.
Choosing and Prepping Your Dates for Success
Before diving into the methods, let's talk about the star ingredient: dates. While premium Medjool dates are often lauded for their natural creaminess, you don't necessarily need to splurge on the highest quality for date paste. For most methods, especially steaming and microwaving, smaller, cheaper, and even slightly drier dates work wonderfully as they will be softened and processed anyway. If you're aiming for the *ultimate* silken paste using the soaking method, Medjool dates do offer an extra edge due to their naturally soft and rich texture.
Regardless of the variety, the first crucial step is always to
pit your dates. Most dates sold today are pitted, but it's always a good idea to double-check. If they still have pits, simply make a slit lengthwise down each date and remove the hard stone. For faster softening and processing, it's also beneficial to chop the pitted dates into smaller pieces, roughly 1/2 to 1-inch chunks. This increases the surface area, allowing them to absorb heat and moisture more efficiently.
Method 1: The Speedy Microwave Approach
When time is of the essence, the microwave is your best friend for preparing date paste. This method is incredibly fast and efficient, making it perfect for last-minute recipe needs.
Here’s
how to make date paste using your microwave:
1.
Combine Dates and Water: Place 1 cup of chopped, pitted dates into a microwave-safe bowl. Add 2/3 cup of water. While the reference suggests this ratio, you can slightly adjust it based on your desired consistency – a little less water for a thicker paste, a little more for a thinner one.
2.
Microwave: Heat on high for approximately 2.5 minutes. The water will boil, and the dates will begin to soften significantly.
3.
Careful Handling: Remove the bowl from the microwave with caution, as it will be very hot.
4.
Drain (Optional, but Recommended): Carefully drain the hot liquid from the dates. Discarding the liquid helps prevent a watery paste and allows you to control the final consistency more precisely. Some might choose to reserve a tablespoon or two if they prefer a looser paste for blending.
5.
Mash or Process: Transfer the softened dates to a cutting board and mash them with a fork or a potato ricer until a coarse paste forms. For a truly smooth consistency, transfer the dates to a food processor and blend until your desired smoothness is achieved, scraping down the sides as needed.
Pro Tip: Date paste made from microwaved dates tends to be slightly lighter in color and less sticky compared to steamed dates. This can be desirable for certain applications where a less tacky texture is preferred.
Method 2: The Gentle Steam Method
Steaming is another excellent way to soften dates, yielding a paste that is often praised for its rich color and slightly stickier, more pliable texture. This method ensures even softening without direct contact with boiling water, preserving more of the dates' natural sugars.
Here’s
how to make date paste by steaming:
1.
Prepare Steaming Setup: Fill a pot with about an inch or two of water and bring it to a boil. Place a steaming basket over the pot, ensuring the water does not touch the bottom of the basket. Alternatively, use an electric steamer.
2.
Steam Dates: Place 1 cup of chopped, pitted dates into the steaming basket. Cover the pot and steam until the dates are tender. This usually takes between 5 to 10 minutes for softer dates, and up to 15-20 minutes for firmer or drier varieties. You'll know they're ready when they look plump and can be easily mashed with a fork.
3.
Transfer and Process: Carefully transfer the steamed dates to a cutting board or directly into a food processor. Mash with a fork or potato ricer for a rustic texture, or process in a food processor until incredibly smooth.
Chef's Insight: Date paste derived from steamed dates is typically darker and has a delightful stickiness, making it ideal for pastries, energy bars, and as a binding agent in many recipes.
Method 3: The Silky Soak – A Game-Changer for Ultimate Smoothness
For those seeking an impeccably smooth, almost caramel-like date paste – one that truly rivals any high-quality store-bought version – the boiling water soak method is the definitive technique. This method, often championed by professional bakers, doesn't just soften the dates; it meticulously relaxes their fibrous structure, allowing them to break down into a truly luscious, silky paste. This method is highlighted in
The Definitive Guide to Perfectly Silky Homemade Date Paste.
Here's
how to make date paste with the silky soak method:
1.
Combine Dates and Boiling Water: Place 2 cups (approximately 12 oz or 340g) of pitted dates into a heat-proof bowl. Pour 1 cup of freshly boiling water over the dates, ensuring they are mostly submerged.
2.
Precise Soaking: Let the dates soak for precisely 10 minutes. This timing is crucial; it's long enough to fully hydrate and relax the date fibers without turning them mushy.
3.
Drain and Process: Drain the dates, reserving a few tablespoons of the soaking liquid. Transfer the softened dates to a powerful food processor. Begin to process, adding a tablespoon of the reserved soaking liquid at a time, only if needed, until you achieve an unbelievably smooth, thick, and consistent paste. You'll likely need to scrape down the sides of the food processor bowl several times.
Why it Works: The brief, intense soak in boiling water allows the dates to swell and their cell walls to break down effectively, making them much easier to blend into a uniformly smooth consistency without any gritty bits.
Elevating Your Date Paste: Flavor Enhancers and Storage Tips
Once you've mastered
how to make date paste, the real fun begins with customization. While plain date paste is fantastic on its own, adding a few simple ingredients can elevate its flavor profile significantly, transforming it into an even more versatile culinary tool. This approach truly allows you to
Elevate Baking with a Natural Sweetener.
Consider these additions (best incorporated during the food processing stage):
*
Spices: A pinch of ground cardamom, cinnamon, nutmeg, or even cloves can add warmth and depth. Start with 1/2 teaspoon per 1-2 cups of dates and adjust to taste. Orange blossom water or rose water also offers a delightful, aromatic touch, especially for Mediterranean-inspired dishes.
*
Fat: A tablespoon of unsalted butter (for richness) or coconut oil (for a vegan option and subtle flavor) can enhance the creaminess and mouthfeel of the paste.
*
Salt: A tiny pinch of sea salt (1/4 teaspoon) goes a long way in balancing the sweetness and intensifying the overall flavor, much like caramel.
*
Extracts: A splash of vanilla extract can round out the sweetness beautifully. Almond extract or rum extract can also add interesting notes.
*
Citrus Zest: The finely grated zest of an orange or lemon can provide a bright, fresh counterpoint to the dates' richness.
Storage Solutions
Proper storage ensures your homemade date paste remains fresh and ready for use:
*
Refrigeration: Store your date paste in an airtight container in the refrigerator for up to 2 weeks. Its natural sugars act as a preservative, giving it a decent shelf life.
*
Freezing: For longer storage, freeze the date paste. You can place it in an airtight container or, for convenience, portion it out into an ice cube tray, freeze until solid, and then transfer the cubes to a freezer-safe bag. Frozen date paste can last for up to 2 months. Thaw in the refrigerator overnight or gently warm in a microwave when ready to use.
Conclusion: Your Secret Weapon for Natural Sweetness
Learning
how to make date paste at home is more than just a recipe; it's about gaining control over the quality and purity of your ingredients. Whether you opt for the lightning-fast microwave method, the gentle steam, or the game-changing boiling water soak, you'll be rewarded with a rich, versatile, and naturally sweet ingredient that will revolutionize your kitchen. From enhancing baked goods and smoothies to providing a wholesome base for energy bars and savory glazes, homemade date paste is a secret weapon every health-conscious cook should have in their arsenal. Embrace the natural sweetness and discover the endless possibilities!